UnClogged 3D Printer: Part 5: Back in Business

We’re back in business!

The last time I had tried to print something, I noticed a bunch of smoke coming out of “C” in the diagram below.  And things were dripping too freely.  I had the thermister at position “A” below, just how its supposed to be.

image

Thanks to acquiring a digital thermometer capable of measuring temperatures up to 200C, I was able to read my own temperatures – and sure enough – Fred in this chart.  The real temperature in the barrel was much higher than was being read.  Why?  This makes no sense!

Well, luckily I had watched a video on how to put a print head back together, and it turns out that I had not looped some Kapton tape around the nozzle first, I had put the thermister directly on there, and then covered it up with tape.      I tried it the other way:  One loop around with tape, then the thermister, and then another layer of tape, yielding sample Barney.   (I also put the fiberglass insulation (tattered, but still in one piece) on it like they suggested.

Sample Thermister Location Temp (C) Reference Thermometer location Temp (C)
Fred A / Direct 130 C 170
Barney A / Kapton 130 C 125
Scooby B 130 C 125

Much better!   We’re in business.. almost.   While printing, the tape gave way and the thermister fell off. 

Why, I wonder?   My guess is that by having one loop of kapton tape, and kapton tape is a good heat transfer agent, it gets to sample the average heat from all around the nozzle, all around the thermister, rather than just one side of the thermister.  Or something like that.   Or maybe there’s just a bad spot on nozzle and I was unlucky.

I tried taping it back on 2 more times.  No luck.  I seem to have done something to the print head, the wires are shorter now, and after much cursing and screaming, I gave up.

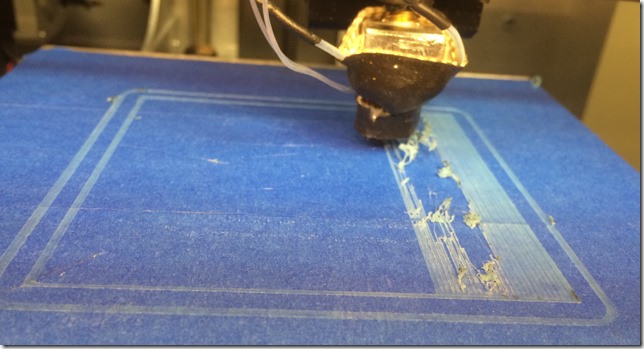
Instead, I put the thermister in at location “B” – inside the fiberglass insulation, which held it snugly in place – and yielded sample Scooby.   We still seemed to be in business.   And here it is, printing:

image

The URL to the above camera is https://www.dropcam.com/p/sunnywiz, although there is no guarantee that it will be pointed at a geeky subject at the time this post posts.

(Those things in the picture, btw, are thingamabobs (technical term) that Jason needs in his Arcade machine build)

Yay! so now that its back to working again, what now?  Hmmm..

For future time historians, the list of all posts on the clog:   http://geekygulati.com/tag/3d-printing+clog/

Clogged 3D Printer: Part 4

Jason did a great job on the nozzle, but after I had it up and printing (nicely), i noticed a trail of smoke coming from the PEEK barrel.  (Why the heck is it named that?)

image

I think I have the barrel too far up into the PEEK thingy, and the heat is heading up there and melting things.

Also, with the thermister dialed in for 140, the plastic was dripping freely … i suspect that things are MUCH hotter than they are registering at the moment.

I might need a secondary source to determine real temperature.  I wonder if my IR gun can get close enough for an accurate reading.

Clogged 3D Printer: part 3

@jstill is the Man.

image

Here’s what he did to unclog the nozzle.

  1. Put it on the Grill, for a while, at 700 degrees or more.     At the end of this, it still had black stuff all over it.  (Much better than my idea of the oven.. no wife being annoyed at me for stinking up the house)
  2. Tried to remove the black stuff with ____ (I didn’t quite catch it) and Mineral Spirits.. didn’t work.
  3. Had a Eureka moment, realized it was all carbon, so he used Hoppe’s No. 9. Gun Bore Cleaning Solvent. A single wipe, and it all came off.
  4. ‘Tis beautiful.

I think for good measure, I’m going to pick up some guitar strings and run floss it as well.   Then put it on and test.    This time, definitely tighter on the barrel .. I think it was loose, when I removed it, there was filament where filament ought not be.

Excited. 

Clogged 3D Printer Part 2

Well, we tried.  And its better.  But it ain’t fixed.

Here’s the first bits of print that came out of it.  You can see the dark stuff that was either the old filament or burnt:

image

However, the stream of filament coming out the end keeps varying.  Sometimes its good, and then other times it fizzles out:

2014-04-24 05.12.00

Conclusion: There’s something still clogging the bottom thing.    More work needs to be done.

Clogged 3D Printer

Problem Discovery

The other night (Time of writing minus 4 days), I set up a hi-resolution Black Dalek print in motion.   I also pointed the Dropcam at it..  what I saw at 8am the next morning Shocked and Amazed me!

[youtube=http://www.youtube.com/watch?v=p1CG_YUcnsA&w=448&h=252&hd=1]
Keep on printing… Keep on printing… (Dora)

(clog at 1:19 or so, but its hard to tell)

2014-04-18 08.56.27The head was swooshing and swishing unrestricted in the air.. no plastic coming out.  But, the filament still seemed to be attached.  (in the past, the reel had developed a bind that had pulled the filament out of the printer)   What?   My first clogged head!    (10,000XP monster!)  

(I still got some good parts out of the print):

Problem Investigation

Here you can see the stripped filament where the gear could not push it in any further:

image

This was as far as I had disassembled the printer before.. knowing I could buy a new print head for $59, I went for the full disassembly.   I referred to several videos online, especially this one:

[youtube=http://www.youtube.com/watch?v=nQohJtS4wrE&w=448&h=252&hd=1]
Thank you Ian Johnson

I successfully exploded it everywhere and got down to the offending parts:

imageimage

image

Now what?   I’m using PLA, so I couldn’t soak in acetone..

De Clogging Solution

Just for the heck of it, the wife and I tried using a candle flame to localize heat up the barrel.    It worked.  First try.  The glops globbed out.  The glips gleeped.   The wires were not affected.   There was much rejoicing.   My wife is awesome.

There was a clog in the peek barrel as well .. I had to use a nail, and then a really small hex driver, and a hammer, to get that one out of the way.  It worked.

I did hook up the barrel assembly to the heaters and test them before I started putting everything back.  It was a little hard to push by hand, but the filament did make it all the way through.  Large glops of black ink (I think the black is VERY inky) came out – I suspect I’ve been running it at too high a temperature, and magic happened, and a lot of ink collected in the barrel.

The Adventure Continues

I’m in the middle of putting the printer back together. 

Luckily, I used a sharpie at a diagonal across the 5 clear pieces so I could figure out how to put them back.   One of them broke, a bit, not too serious, I don’t think.   I’ve stopped at the point just before I put the extruder motor back on.  I expect I have to recalibrate the z-distance, because I’m pretty sure the barrel is now sitting lower than it did before.   Luckily I had Kapton Tape that I could cut up to reattach the thermister.   Hey There, Mister.  

I’ll get a chance to play with it again in 2-4 days.  I hope I can get it back together.. I got my second ever “actually useful” thing to print (for a friend’s arcade machine build).   And I want to do some more name coasters.