From Photoscan to Shapeways: Process 2/N

TL;DR:  Nice idea, but fail.

Holy crunch this is taking a lot of hands on stuff figuring out what works, and what doesn’t.   I decided to step back and take a look at the strength / weaknesses of everybody and see if I could meta a process out of it.

Program Strengths Weaknesses
Agisoft Photoscan Can fill holes; gets normals correct when filling holes
Can Export and Import .OBJ
Can Export and Import WRL
Unique: can create textures from images
Cannot select only visible surfaces for deletion; has to select hidden as well
Can only close holes; does not always generate manifold
Cannot export STL
Cannot resize
Import object cannot have been moved
Netfabb Great job filling holes
Can detect non manifold
Unique: Very good at making things manifold automatically
Import/Export OBJ, STL, WRL
Can resize
No direct mesh manipulation
Free version cannot remove extra shells
Blender Unique: Can do union operations to add missing chunks together
Can detect non-manifold very well
In depth mesh editing
Can resize
Thin wall detection
Import/Export OBJ, STL, WRL
Can remove extra shells
Fills holes with akward normals
Cannot auto-fix manifold
Deleteing faces causes complex manifold problems which escalate quickly
Windows / etc Can ZIP files heh
Shapeways Import texture with ZIP files
Thin wall detection
Unique: Can print in color!
Cannot directly import multi part objects unless ZIP first
Cannot resize
Thin wall fixes loose texture
Cannot get texture when importing OBJ

Proposed Flow

Agisoft
  • Generate mesh
  • Save as A.obj
  • Use circle and block delete to remove chunks to be replaced in blender
  • Save as B.obj
Netfabb
  • Import B.obj
  • Fill holes / clean up / repair
  • Save C.obj
Blender
  • Import A.obj
  • Import C.obj – should be manifold
  • Create additional surfaces D1,D2 etc to union using A for reference
  • Union them with C <– not sure if this will work every time. 
  • If it works, save as F.obj
  • If unioning does not work, then:
    • Import B.obj
    • Prune surfaces D1,D2 etc so that there is no overlap with B
    • Create faces to join B and D1,D2 etc so that a fill holes will do the right thing
    • Save as E.obj
Agisoft (if stuck at E)
  • Load E.obj
  • Fill holes
  • Call this F.obj
Agisoft
  • Load model from F.obj
  • Generate textures
  • Export as G + GT (.obj)
Blender
  • Start over
  • Load G + GT (.obj)
  • Relocate, Orient
  • Scale, Apply scale
  • Thin wall detect
  • Save as H  + GT (.X3D)
Windows
  • Zip H+GT to HZ
Shapeways
  • Upload HZ
  • Look at thin walls situation -> leave open
Blender
  • Fix thin wall situations (and other problems)
  • Save as I + GT (.x3d)
Windows
  • Zip I+GT to IZ
Shapeways
  • Replace with IZ
  • Hopefully can print.

Wow, that’s a lot of steps.   No wonder I’m a bit frustrated.  

Update as of 6/1 (3-4 days after writing this): 

I tried it.  Twice.   5 hours later: It’s a fail.     The reason is that:  When I get to step G->H in Blender – when I do any fixes in blender – if those fixes involve cutting away dead faces and closing holes or anything like that – I loose texture.  As I usually have to do this surgery around places where I filled it in during step C+DN, Its all over the model, and It would look ugly.

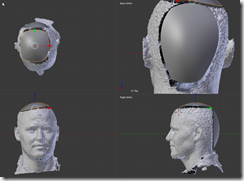
However, I did learn a bit about fitting NURBS spheres onto human faces.   You go into Alt-Q 4-way view (Top, right, front), and first fit the edge pieces (where the surface comes all the way out to the control point); before going on to the other bits.  In the case of a human head, the anchor points are:  just above the ears, an imaginary line going back from the chin, just under the nose, etc.    This could be its own blog post, but I’d need more practice to verify that it works well every time. 

Next up I’m going to try a much-reduced polygon count – get rid of some of this detail that causes the thin walls.  The idea would be to use color and texture to make it look like the human.

From PhotoScan to Shapeways: 1/N – Using Blender as an intermediary

imageShapeways is one of several print services that offer full color prints – something I cannot afford myself.   However, they do not allow on-site scaling – you have to scale the model yourself.    There are also various cleanup steps that have to happen before shapeways will print your model.  For these I use blender.  (ref: shapeways page on blender editing)

Scaling, then Lighting, then Checking for Problems

Blender does not (by default) understand units of measurement; however during import, shapeways will ask what the unit is.  I go with mm; I want the model to be up to 50mm in size.

imageThe original is starting out at (Dimensions) 0.972 (assumed mm) as its largest dimension.  If I scale it up by 50, I get 31 x 48 x 40 instead.    Then, very important:  apply scale so that the XYZ coordinates are actually changed (some tools, like solidify, work before scaling – used for hollowing out an object).

imageimageSide note if you want to check textures: A this point, the model is a bit dark as the original light is now inside the model, and not quite bright enough.   I usually find and drag the Lamp gand drag it out into the open, and give it a distance for falloff of 3000 and more energy. 

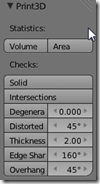
And now the fun part!  Turn on the 3d printing tools (via extensions), and … don’t believe everything.  But do check for minimum wall thickness of 2mm.  and.. imageouch.  A lot of stuff.     Now, Shapeways may not complain about all of this – you are always welcome to upload.  In fact, I’m doing just that, to see what they will come back with.

imageimage

Shapeways

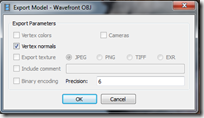
False End #1Do not export as .OBJ.   Shapeways does not process the .MTL and the .PNG file, and you get no color.  Instead, try .X3D.

If you open the .x3d with a large-text-file editor (like notepad++, or even in blender), you’ll find that it has a reference to a texture file with a different name: 

image

Be aware of it – zip both the .png and the .x3d file into a .zip file for upload to shapeways.   

After the file uploads and gets processed (30 seconds?), you get this screen:

image

And if I scroll all the way down, to the interesting stuff – Full Color Sandstone:

image

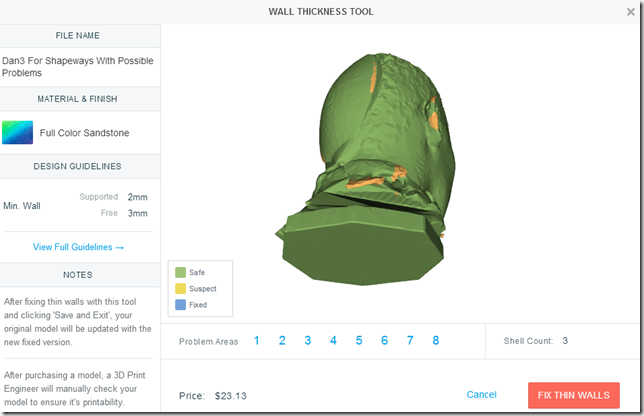
First, $23.13 .. OUCH.    Second, Thin walls.  It’s a link.   Follow the link. 

image

As you can see, this is not the sea of yellow that we saw earlier.   But, it also has this “Fix Thin Walls” button.

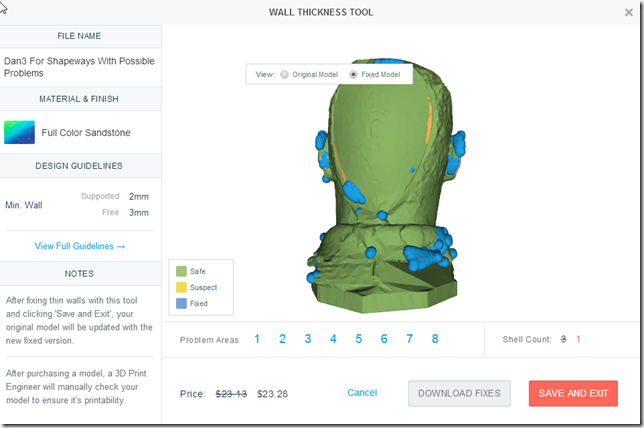
image

Oh my, we gave Dan the pox.  Well, no big deal, lets print that anyway …

image

But now we have lost color. No deal.  Back to fixing wall thickness in blender (and reducing the size of the model!)

Super Secret Project

I hav2014-05-30 12_42_47-Michael Thornberry (WaywardMage) on Twittere a coworker who loves to code.   He has a list of technologies that he’s been just hoping to find a problem for.   Angular, Xamarin, WebAPI, all kinds of stuff.

I do have such a list; for me, they  include things like Angular and Erlang.    I also have a separate list of projects that I would like to code (or have coded someday), problems that need to be solved.    In the past, I would start to work on one of these projects.. get 2-3 hours in, realize that the full solution is more like 50-60 hours away.. promise myself to work on it the next weekend..  and then life moves on, something else comes up, the need is just not that great, and it doesn’t get done.

// TODO: separate blog post on obsolescence

Synergy is Born

At the end of a BrainNom Monday (where we sit around and watch instructional videos on the web or delve into new subjects as a group of software engineers), I mentioned some of these side projects I had never gotten around to.

He got pretty excited.    I have given him a reasonable target to try to hit with this array of tools he’s been sharpening.      So we started a collaboration.

The Experiment

I’m taking on the role of product manager – dealing with what the app should do.. how it handles multiple people.. the user experience … sharing .. stuff like that.  And he’s pursuing the coding.

He gives me feedback on the requirements; I give him feedback on the technology.

And we’re starting to build this app!

He has laid out the project structure, which includes a bunch of words I had not heard of before.. Ionic, Cordova, Ripple.    He showed them to me today.     I have a bunch of requirements and data structures and use cases and build orders of features figured out – keeping an eye out for what’s the shortest path to get to a minimum viable product, but to have enough foundational UI that the future features have a place to sit without a UI (and UX) rewrite.

The App

Will be revealed in due time.  Either it will go live, and then we’ll have a whole series of blog posts of how we got there (with full source disclosed), or it won’t, in which case we’ll blog about the demise.   I could give you a technically truthful teaser and say it has to do with temperature and burning, but I’d be trying to throw you off-course, of course.

I think we should come up with a cool code-name for this app, so I can talk about the app without actually giving it away.   Hmm.

Photoscan: Using Blender as an intermediary touch up tool

I’m glad that I have a solution (use a good camera and lens) for capturing 3D models – but I’m still trying to get the process matured – to the point where I could run a scan-and-print booth at a flea market.  (not that I’m going to; I’d just like to be that good at it).

The Problem: No Noggin

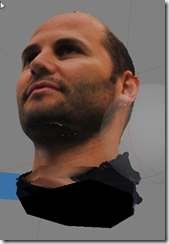
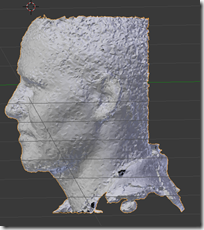
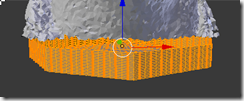
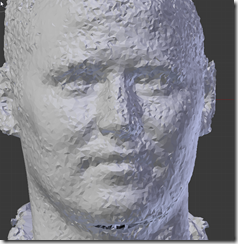
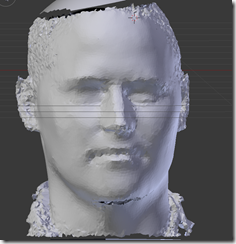
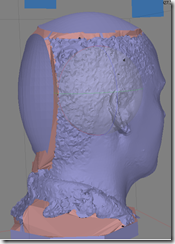
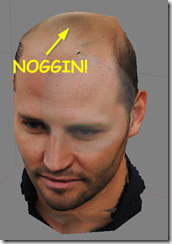
imageThis is a DSLR Dan Scan with a Medium Dense Point cloud on Moderate (Ultra high didn’t really add to the detail).  The top of the head is missing, and there’s a large seam in the back that is not filled.  Also, the bottom isn’t a good base for a printed model.

The Solution:  Blender!

image image

image

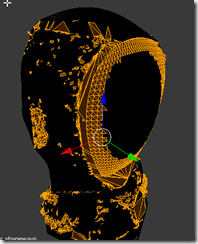
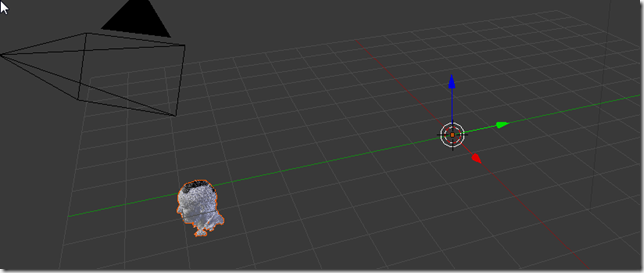
It is important to leave the model where it comes in – I have to export it at that exact spot in order for Photoscan to pick it up.   Luckily, I can select the object and zoom to it using “.” on the keyboard. (Blender: shortcuts keys are dependent on which window is active, it has to be the 3d window for . to work)
I then remove stuff from the model, and add in some more surfaces (NURBS surface shown here), to get the model closer to what I want:

a image b image c image

d image e image f image

  • a: I use perspective + border select + delete vertices to clear away an even cut which I will augment with a surface.
  • b,c: I create (separate object) a NURBS surface with “Endpoint=UV”; I fit the outer borders first (so that there is a little gap showing) and then move the inner points (how much it sticks out) in; I try to ensure there’s always a gap between the actual model and it (easier to join later)
  • d: For the base, I create a square (cylinder would have been better?), move the edges in, and then delete the top surface.   I subdivide till it has the right “resolution”.
  • I then convert NURBS to meshes; select the meshes; subdivide them to match resolution, and join them everything into a single mesh.
  • e: Sometimes to avoid “helmet head” effects, I have to delete some of the edge faces of the former NURBS by hand.
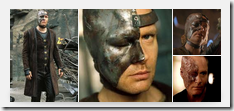
  • f: Stark from Farscape.

Another touch-up I can do in Blender is to smooth skin surfaces using “Scuplt”:

imageimage

Wrapping it up

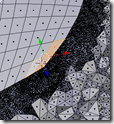
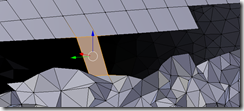
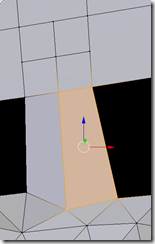
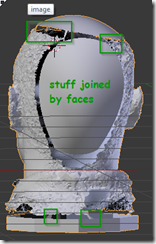
I have to join the pieces together by hand *somewhere*, so that the holes have boundaries.  Try to keep each hole in 1 axis.    Notice how I subdivide the larger mesh so that the points line up. Don’t forget to Normalize faces outward when done.

imageimageimage


I can then export the .OBJ back to disk, and in to Agisoft Photoscan, where I finish the hole-filling process.  (I’ve tried filling the holes in blender, but I run into vertex normalization / faces being inverted problems.)

imageimageimage

And then, we can build a texture, and Dan’s noggin won’t be left out.

And Now for Something Completely Different:

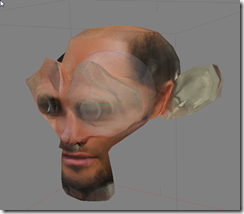
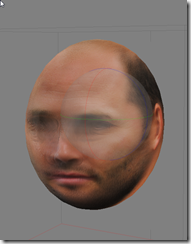
The other direction to go is to use a completely different mesh and see what happens:

suzanne the monkey:
image

sphere scaled to head shape:
image

We could also do a Minecraft version of Dan – by joining several rescaled cubes, and then building a texture around that.  That would make for an excellent Pepakura model.   However, I’m out of time on this blog post (1h24m so far), so I’ll save that for another day.

(after editing:  1h40m taken)

Day at the Office: Just another Day, Nothing Special

I have several 3d printing posts queued up on a every-other-day schedule.  I feel I really should write some code, or something, to re-present the part of the that does code for a living.

But today was .. just an uneventful day.

  • I did the weekly Status Report.    I’m doing some fun stuff in there, trying to represent the flow of work in and out of the process.. when things go to test, when they go to deployment, when bugs are introduced vs discovered, etc.   In color.  In Excel.  image
      • I wonder how much I would get out of marking “when bugs are introduced”.   Kinda see the full cost of deploying a feature – also seeing all the bugs that might have been introduced at the same time.
  • I worked on two bugs.  
    • The first one was a GUI thing – some stuff on the screen was flickering.  Turns out, some XAML had gotten changed to {Binding … UpdateOnPropertyChange}, and the underlying property was being += ‘ed in a loop.  So every time the loop ran through, it updated the UI.   
      • Fix #1: accumulate in a temporary variable and then assign at the end.   
      • Fix #2: in this minor control, turn off the automatic NotifyOfPropertyChange on every set, and provide a NotifyOfPropertyChange() method that a parent could control.. and then modify all parents to call NotifyOfPropertyChange outside of the loops that updated stuff.
      • Of course I profiled it before and after.   Went from long drawn out CPU hog-ness to itty bitty spikey. 
    • The second was a business rule implementation bug.   The client has several settings for something – lets call it a light saber setting – and the settings were something like “only cut through meat”, “cut everything”, “don’t cut through living tissue”, and “don’t cut green things”.  Turns out, green things needed to be excluded from one of the meat settings as well (or something like that).
      • Most of the time of the fix was me asking the client, “so what you mean is this”. 
      • I got it wrong at first.   I thought they meant the light saber dispenser setting, “only dispense to Jedi’s but also to green things”.   When I fully explained what I was going to do (with screenshots!), the client realized the miscommunication and corrected me.
      • Actual size of fix:   less than 20 characters.
  • Then I left early, and logged on at night, and did a production release in 1.5 hours.
    • Backing up the Prod database, of course.
    • Running database deployment scripts (I use a can-rerun-indefinitely approach with some batch scripts)
    • Using Teamcity to deploy to production.  Over VPN, it takes about 20 minutes.   But I had to do it twice, due to a failed VPN.
    • Testing the app after deployment – that the 6-7 fixes we deployed were working.  I didn’t check all of them, just the ones involving database changes and settings migrations, etc.
    • And the communication that the deployment happened, what to expect, for the brave soul who herds the client’s users.

Just another day.    Nothing exciting, just work.    A Good day.

Freakin Holes

This is my part in NetFabb.  Its Fine.

image

This is my part in Blender with Select NonManifold.   its Fine.

imageimageimage

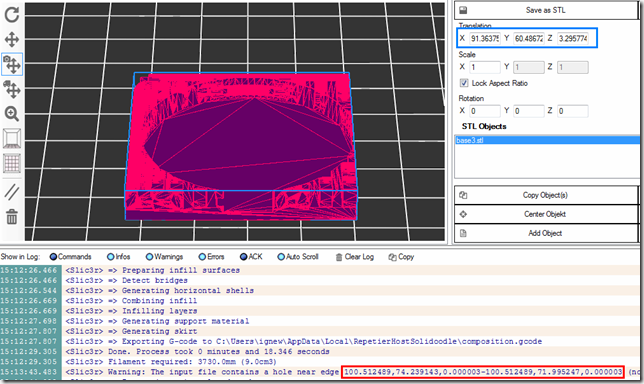
This is what Repetier Host and Slic3r 0.99 think of my part.  They are not fine.

image

Following the Trail

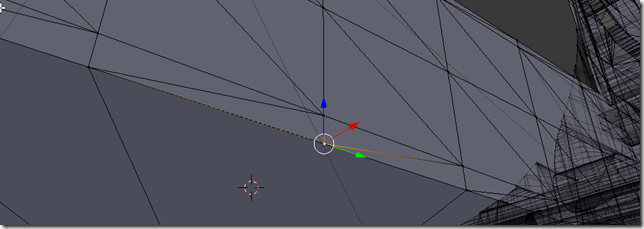
Loading the part up in blender, translating it by the X Y Z indicated in Repetier host, and then putting the 3d cursor at the specified coordinates:

image

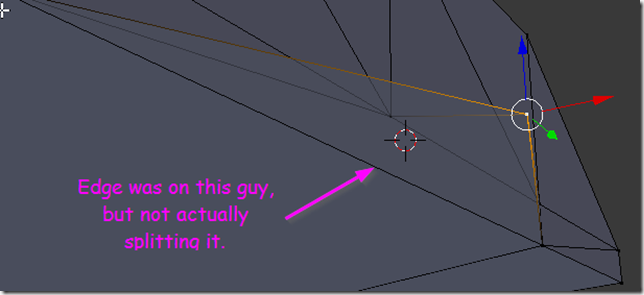
Nothing suspcious?    Rereading: it said “near edge”, so there should be an edge between those two locations.  Because the X and Z stay constant, its along the Y axis.   So it must be one of these guys:

image

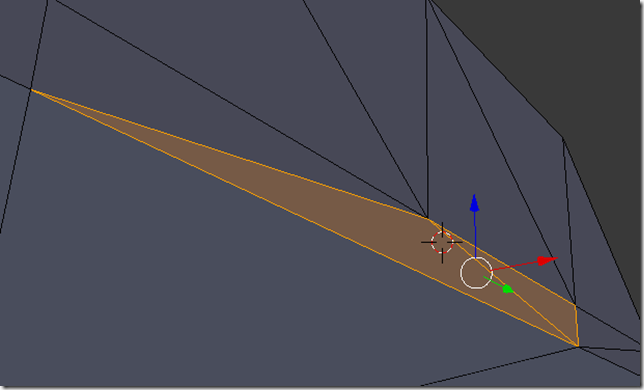
Aha – I think I found it.   There’s actually several vertices here. Ctrl-+ a few times to grow selection, Shift H to hide unselected, and then move some stuff around.

image

Delete the vertex, look for holes and fix:

image

Send it back over to slicer, and try again:

image

Not winning today.

Update: didn’t seem to have any problems with slic3r 1.01.  Now I have to figure out how to configure Repetier Host to talk to a new slic3r install on the computer. (Update: very easy. Tell RH which directory slic3r lives in, and it handles the rest).

Getting Photoscan to Work: 3/N

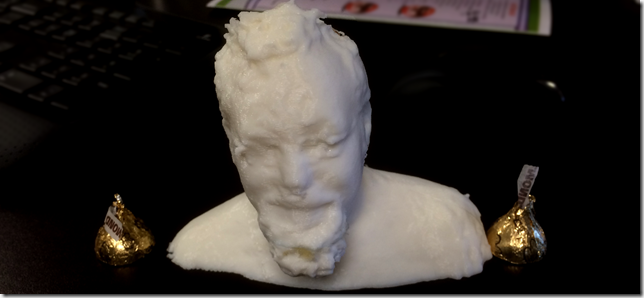
Good news!  Using a Nikon camera with a 55mm lense, I got pretty good (printable) results!

image
Subject:  Lamont Adams

Here’s how it went down:

  • I borrowed Dan Murphy’s Nikon DSLR Camera.  He had several lenses, I chose the 55mm lens (not prime; I just didn’t zoom it)
  • I sat the subject in an empty room in the center beneath four fluorescent lights.   By sitting them, they stay stiller; and I am taller, so I can get more details of their hair.
  • I started taking pictures from their back, so that the pictures across the front are contiguous / seamless.
  • I took 3 extra pictures from the front from a lower angle, to get nose and chin details
  • image
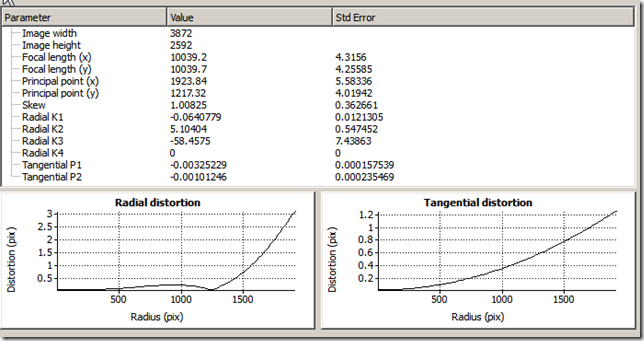
  • I took Lens Calibration pictures starting from as far away as possible; and got a lens profile.  I did not fit k4.
  • image
  • image
  • I used High accuracy matching and a Medium Point cloud; Low polygon count mesh (20k)
  • Minor editing of point cloud before meshing and closing holes (deleting floaters and fixing hair)
  • Export mesh to Wavefront .OBJ format; use Blender to rotate it and convert it to STL; export STL at 100x scale
  • Netfabb to clean up the STL and scale it precisely (100mm height)
  • 6 hours to print it.

I have ordered a small full color print from Shapeways to see what that looks like.    Should be here June sometime.

He looks kinda like the KFC Colonel.  What with that chin growth and all.

Addendum:   Instead of a 4/N post, I’ll just put him here:  Yellow Dan the Pirate Man with those dark sunken eyes.

image

Saving Wrists

image

My wrists have been hurting lately.. especially the right one.  Wife thinks I have carpel tunnel syndrome, she might be right.   I already have the ergonomic keyboard, and a trackball; I can use a mouse in either hand, with either button configuration.    However, when working with code, there’s definitely a “switch hand to arrow keys” and “switch back” repetitive thing that happens.  (at least for me).  So, this journey to save on keystrokes and wrist movements.

Step 1:  Try Not to Use the Mouse

I started by putting the mouse very far away from me.   This forced me to try to find keyboard shortcuts for most of the things I was trying to do – especially switching windows.  Here are some of the ones I use now;  most of these are not the default keyboard combinations, but rather the secondary keyboard combinations, which I was left with after vsvim got installed.

Shft-Alt-L or Ctrl-Alt-L Solution Explorer
F5 Build + Debug
F6 or Ctrl-Shift-B Build
Ctrl-Alt-O Ouptut Window
Ctrl-R Ctrl-R Resharper Refactor
Alt-~ Navigate to related symbol
Ctrl-K C Show Pending Changes
Ctrl-T, Ctrl-Shift-T Resharper Navigate to Class / File
Alt-\ Go to Member
Ctrl-Alt-F Show File Structure
Alt-E O L Turn off auto-collapsed stuff

I also assumed a layout where I have a bunch of code windows, and all other windows are either shoved over on the right or detached and on another monitor.   No more messing with split windows all over the place.  By using a keyboard shortcut, wherever the window is, it becomes visible.  I don’t hunt around in tabs anymore.

image

Step 2: VsVim

History

I first learned vi in 1983, on a Vt100 Terminal emulator connected via a 150 baud modem to the unix server provided by Iowa State University’s Computer Science department.   (I was still in high school, I was visiting my brother who was a graduate student at the time).  There was some kind of vi-tutor program that I went through.    It was also much better than edlin and ed, which were my other options at the time.

Anti-Religious-Statement: I used it religiously till 1990, when learning LISP, I also learned to love emacs.   Yes, I stayed in emacs most of the time, starting shell windows as needed.   

I maintained a proficiency in both vi and emacs till 2001, when I got assimilated by .Net and left my Unix roots behind.

And Now

Having had a history with it, I decided to try vsvim and see how quickly things came back to me.

The first thing I noticed is that every other program I used, whenever I mis typ hhhhcwtyped something, I’d start throwing out gibberish involving hhhjjjjxdw vi movement commands.  And pressing ESC a lot.   I (am still having to) to try to train my eyes to only use vi commands when I saw the flashing block yellow cursor that I configured it to be.

imageimage

I also had to un-bind a few things – for example, vi’s Ctrl-R is a lot less useful to me than Resharper’s Ctrl-R Refactorhhhhhhhhhhhhhhh   I did it again.   vi’s Ctrl-R “redo” I could just do :redo instead.

And where am I now?  I still need to think about it a bit..  but, for example, recently I changed some code from being a static Foo.DoSomething() to a IFoo.DoSomething(), and I had to inject the class in a bunch (10+?) of constructors.   The key sequences went something like this. (R# in Red, vsvim command in blue)

ALT-\ ctor ENTER Jump to the constructor in the file (R#)
/) ENTER Search forward for “)” and put cursor there (/ and ? go across lines, fF are in current line only)
i, IFoo foo ESC Insert “, IFoo foo”
F, Go back to the comma
v lllllllllll “ay Enter visual select mode, highlight going right, to buffer A, yank (copy); cursor back at ,
/foo ENTER jump forward to foo
Alt-ENTER ENTER Use R# “insert field for this thingy in the constructor” thingy
Ctrl-T yafvm ENTER Use R# Go to Class, looking for YetAnotherFooViewModel  (most of the common things I work with have a very fast acronym.  For example “BasePortfolioEditorViewModel” is “bpevm”.  I can also use regexp stuff)
Alt-\ ctor ENTER Jump to constructor
/) ENTER Go to closing brace
aP paste from buffer A before cursor

If this sounds like complete gibberish …  yes it is.  But here’s the thing:

  • I am talking aweZUM s3krit c0dez with my computer!
  • My fingers are not leaving the home position on the keyboard.  Not even for arrow keys.
  • By storing snippets of text into paste buffers (a-z, 0-9, etc), I can avoid typing those things again, which is very useful.
  • If I plan ahead a bit I can save a lot of keystrokes trying to get somewhere in a file.
  • Once I enter insert mode, Its just like normal – can still use arrow keys to move around, shift-arrow to select, etc.

It is geeky, nerdy, experimental, and it might be helping my wrists a bit.   1 week so far, still going okay.

another trick I use:  variable names like “a”, “b”, “c” .. and then I Ctrl-R Ctrl-R rename them to something better later.

I would not recommend trying to learn vi without a vi-tutor type program

Tired of PhotoScan, I just want it to Work: 2/N

Since the last Blog post, I finished going around the object and selecting enough cameras to get a decent set of dense point cloud going.  I did this in four chunks; I was trying to quarter the model with each chunk:

image
9 cameras
1553 points
image
17 cameras
3260 points
image
10 cameras
2332 points
image
11 cameras
2575 points

Lets Align Some Chunks, Shall We?

Align Chunks, Camera Based, 1 Camera overlap

Nothing.  It needs more cameras?  I could see it being in 3 dimensions, it would need 3 cameras minimum.  I’ll come back to this with more cameras in overlap.

Align Chunks, Point Based

image

Not Quite.   And as far as I can tell, there are no manual align controls anywhere (in the non-professional version).

I could take this out to Meshlab and try to align it there, however, I won’t later be able to map a texture; I have to solve this in PhotoScan. 

Add More Cameras, Align Chunks, Camera Based, 3 Camera Overlap

While I’m at it, I also add in a few more cameras in some of the gaps that I see.  And this is what I get:

image

Queue Darth Vader Imperial March

I can tell it got the cameras correct.   However, my fear is realized:  I think as I walked around the subject, he moved slightly.  Or, my distance from the subject was not constant, so I ran into some lens calibration issues, and thus the resultant object was not mapped at the correct size.    Either way, what we have now is a FrankenDan.

image

I cannot resist.  Going all the way through to a model and texturing this beauty – and learning how to do an animation in blender at the same time —

[youtube=http://www.youtube.com/watch?v=-V4Yam2yCU8&w=448&h=252&hd=1]
Franken Dan Murphy

Attempting a single chunk with the same 55 cameras

image

What is happening is either a) the model moved, or b) I changed distance from the model (and the camera alignment is wonky), and it just cannot get the math to work.  FrankenDan is actually a better representation of the reality that was captured. 

So.. I don’t think there is a solution here, with a GoPro Hero3 walking around a subject.   There are several directions I could go, though:

  • Start from the back of the subject, so that the seam would be in the back.
  • Put markers on the person’s back (so that there is something to “fix” on), or give them a “garland” of some sort.
  • Use the 120fps to capture the model quicker; but I need to find a reliable way to spin the camera around the subject and hopefully not invoke motion blur.  (Hula Hoop Mount?)
  • Use a better camera (not a GoPro); perhaps a DSLR; with a ring laid out for distance from the subject (see teaser solution below)
  • Use multiple cameras! (so many people have had success with this – and they don’t have to be good cameras either)

Teaser Solution:  DSLR

In comparison, here is me, taken via a DSLR camera with a 50mm fixed (prime) lens.  Its not quite printable, as the (shiny? homogeneous?) back of my head failed to capture.   There’s definitely something to be said for not using a GoPro.

imageimage