3D Models.. from Camera to Paper

I’ve been playing with “structure from motion” / “photogrammetry” apps for a bit.  Lots of stuff still to figure out, but here’s a possible interesting path.   Note that none of this is optimal – wrong camera, wrong print medium, etc – but its fun.

1.  Start with a Video of walking around The Dude Abiding.

[youtube=http://www.youtube.com/watch?v=XkrIkdK0kjI&w=448&h=252&hd=1]
He owned the copy of Lebowski that I watched, so I associate him with the Dude

(His name is Joel, he’s one of my coworkers, he also teaches kids how to code)

2.  Using VLC, play then Shift-S to snap, then plan, then Shift-S to snap, to extract a bunch of frames.

2014-04-18 14_32_47-F__2014_3dmodels_joel

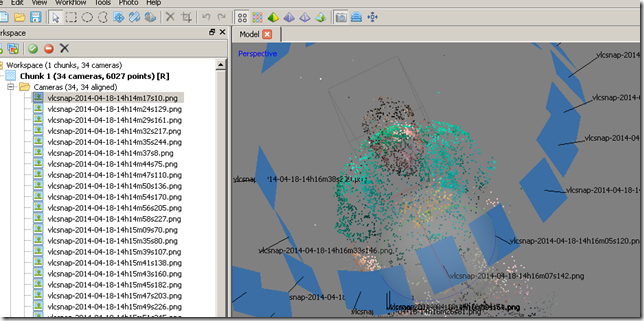
3. Load them into Agisoft PhotoScan ($179, or you could go 123D Catch from Autodesk, that one is free, but possibly less accurate?).   Run “Align Cameras”, get point cloud.

2014-04-23 16_27_44-joel.psz — Agisoft PhotoScan

4. Crop in the model box, hit Build Dense Cloud.  This is where it starts to look really interesting.

2014-04-23 16_28_03-joel.psz — Agisoft PhotoScan

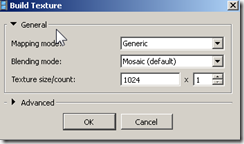
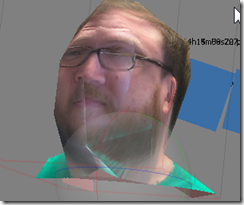
5.  Build a Model .. Build Texture.  This is what the result looks like at “medium” resolution:

2014-04-18 14_32_30-Untitled_ — Agisoft PhotoScan (demo)

Not the greatest, but that’s because of the camera I used (video compression = artifacting = bumps) plus camera lens distortion etc.

6. However, that doesn’t work for what we’re doing next.  I don’t own a $10k color 3d printer.  So instead.. paper!

Build a model at lower resolutions:

2014-04-23 16_28_23-Build Mesh2014-04-23 16_28_49-joel.psz — Agisoft PhotoScan

Don’t forget to close holes! (tools menu) …  build texture…

2014-04-23 16_29_00-Build Texture2014-04-23 16_29_51-joel.psz_ — Agisoft PhotoScan

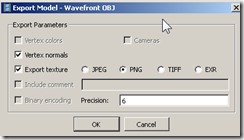
7. Export the model.  This is the $179 pay for step in Agisoft PhotoScan.

2014-04-23 16_30_16-Export Model - Wavefront OBJ

Note that this saves both a .JPG and a .PNG texture.  JPG on the Left.    I might be mistaken, but I think they were saved at the same time.   Actually, the .JPG might be the overall “build me a texture”, and the .PNG is the “export my model to wavefront”.   It’s a little freaky.

joeljoel

8.  Load the .OBJ into Pepakura.  $39, I totally plan to buy it.

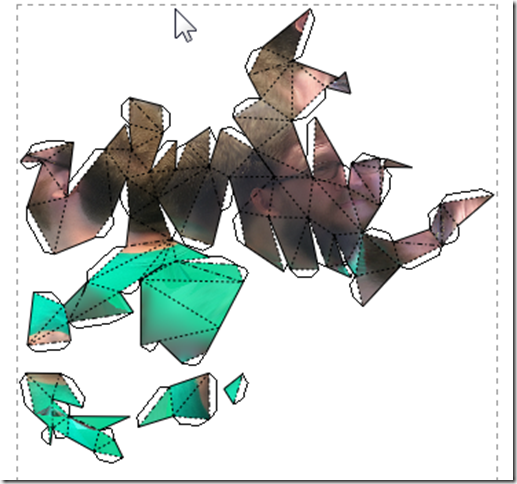
2014-04-23 16_31_47-joel - Pepakura Designer 3

9. Unfold, and Print:

2014-04-23 16_31_55-joel - Pepakura Designer 3

10.  Print it out on cardstock, cut, and fold ..

I haven’t done this part yet.

These screenshots were from my second attempt.  Here is Joel holding my first attempt, which was 500 faces, a bit too complex:

2014-04-23 14.25.40

Day at the Office: Syncing Systems

I have been on a coding adventure for the last two days. 

Customer has a system, which involves holdings, and then proposed trades on those holdings. However, there’s also a master system that sends a new list of holdings on a daily basis.  The master system does not know about the proposed trades, it says “here’s the new list”.

image

The algorithm when updating the list of holdings to the new holdings went like this:

  • delete anything that doesn’t have a proposed trade on it
  • copy in the stuff from master, creating new ones, except…
  • if an existing holding is found, instead of creating a new one, update the holding to look like what the master says it should (with various keys to try to grab the right one)

The Problem

There was a holding of Quantity = 20 that had proposed trades of –10 against it.  The incoming holdings were of quantity 3 and 15.   It updated 20 to 3, causing a math imbalance in the system.

Further problem on more investigation

It was also iterating the incoming list, so if I had trades against a holding H1, and H1 (or something like it) was not included in the new list, then the trades would get left behind against a stale holding.

My Solution Take 2

  • Delete any holding without a proposed trade on it
  • Figure out our maximum id so far
  • Always insert all data from master as new.   (Now we have duplicate copies)
  • Walk through all the old holdings and proposed trades; try to match the proposed trades up against the new holdings
    • If no match found, log it and delete the proposed trade
  • Having moved all the proposed stuff over to a new parent, now delete all old holdings <= maximum id (no more duplicates)

Why I thought it was Clever

Suppose the load fails. 

Since I’m only either updating or deleting proposed trades, I will not have any duplication of proposed trades.

Since I’m deleting all holdings prior to where I started inserting the new holdings, as long as I successfully complete a load, I will delete any old bad data from a previously failed load.

The Matching Algorithm

The general idea is:  Sort “available buckets”, sort “Proposed Trades”, and then start matching trades to buckets.

  • imageI tested this out on paper – as in, I cut out little pieces of paper, and tried the different options; I determined sorting low to high on buckets and high to low on trades was my best bet. 
  • I used a fit option of f(x1,y1,x2,y2):decimal to give me, for any trade, which bucket it would best fit in (after sizing was taken care of).  (the X’s and Y’s are acquisition dates and execution prices, both of which can be “touched up” on the master system, making an exact match every time non-feasible)

To Translate This To Code

Because the matching stuff could get complicated, I made its own little command for it (see command-query separation).

image

I was not shy about creating more DTO’s for the specific inputs and outputs needed by this command. 

image

I wrote enough tests to verify that it was doing the right thing.  When I do unit tests, Iassume only developers will read them, so I don’t spend a lot of time making the names super-descriptive.  Some-descriptive, yes, not super-descriptive.

Embedded image permalink image

And then I wired it up.   Turns out, I wired it into location #1, and that turned out to not work – transactions, entity framework, new transactions, missing ID’s, etc.   So I ended up wiring it into location #2 (after the fact), and that worked a lot better.   Good thing I had black-boxed its meaning, it was easy surgery.

Clogged 3D Printer

Problem Discovery

The other night (Time of writing minus 4 days), I set up a hi-resolution Black Dalek print in motion.   I also pointed the Dropcam at it..  what I saw at 8am the next morning Shocked and Amazed me!

[youtube=http://www.youtube.com/watch?v=p1CG_YUcnsA&w=448&h=252&hd=1]
Keep on printing… Keep on printing… (Dora)

(clog at 1:19 or so, but its hard to tell)

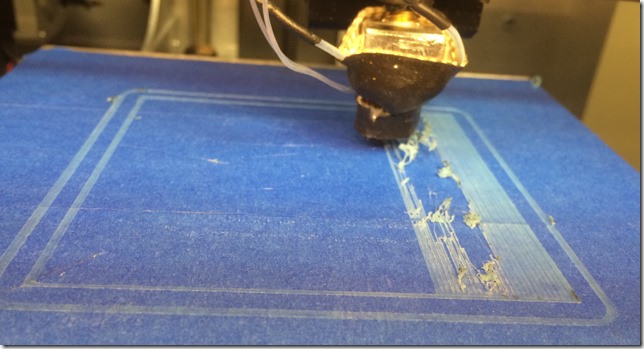
2014-04-18 08.56.27The head was swooshing and swishing unrestricted in the air.. no plastic coming out.  But, the filament still seemed to be attached.  (in the past, the reel had developed a bind that had pulled the filament out of the printer)   What?   My first clogged head!    (10,000XP monster!)  

(I still got some good parts out of the print):

Problem Investigation

Here you can see the stripped filament where the gear could not push it in any further:

image

This was as far as I had disassembled the printer before.. knowing I could buy a new print head for $59, I went for the full disassembly.   I referred to several videos online, especially this one:

[youtube=http://www.youtube.com/watch?v=nQohJtS4wrE&w=448&h=252&hd=1]
Thank you Ian Johnson

I successfully exploded it everywhere and got down to the offending parts:

imageimage

image

Now what?   I’m using PLA, so I couldn’t soak in acetone..

De Clogging Solution

Just for the heck of it, the wife and I tried using a candle flame to localize heat up the barrel.    It worked.  First try.  The glops globbed out.  The glips gleeped.   The wires were not affected.   There was much rejoicing.   My wife is awesome.

There was a clog in the peek barrel as well .. I had to use a nail, and then a really small hex driver, and a hammer, to get that one out of the way.  It worked.

I did hook up the barrel assembly to the heaters and test them before I started putting everything back.  It was a little hard to push by hand, but the filament did make it all the way through.  Large glops of black ink (I think the black is VERY inky) came out – I suspect I’ve been running it at too high a temperature, and magic happened, and a lot of ink collected in the barrel.

The Adventure Continues

I’m in the middle of putting the printer back together. 

Luckily, I used a sharpie at a diagonal across the 5 clear pieces so I could figure out how to put them back.   One of them broke, a bit, not too serious, I don’t think.   I’ve stopped at the point just before I put the extruder motor back on.  I expect I have to recalibrate the z-distance, because I’m pretty sure the barrel is now sitting lower than it did before.   Luckily I had Kapton Tape that I could cut up to reattach the thermister.   Hey There, Mister.  

I’ll get a chance to play with it again in 2-4 days.  I hope I can get it back together.. I got my second ever “actually useful” thing to print (for a friend’s arcade machine build).   And I want to do some more name coasters.

A Coaster of My Name

Playing with font extrusion.. trying to make interesting shapes:

image

I did this by combining 4 things:

  • “SUNJEEV” extruded (default font)
  • “GULATI” extruded (default font)
  • a box, squished, to make the base plate (the “J” is taller than the rest)
  • A sphere, removed from the result, to make the “dip” in the top

This was all done in blender, then cleaned up in Netfabb, and then printed.

The drawback is there’s a LOT of support structure to remove.  I might try printing it on end with the fonts facing “up” at a 45 degree angle, but then I run into stability problems. 

image

This shows the bottom.  The previous print had been dark blue (a TARDIS Chess set, if you must know, printed by Joel), and when I changed to the light blue (throw away) filament, I just let it do the color change while printing.  I like the effect!   It hardly ever lasts more than a layer, so I might keep doing that, its fun.

Its not really a Coaster.  Thanks to the dip, cups don’t sit well in it.  Need to inset it with a square next time. Or a cylinder, and make it bigger.

I wish I could do multicolor prints.

E-Cycling

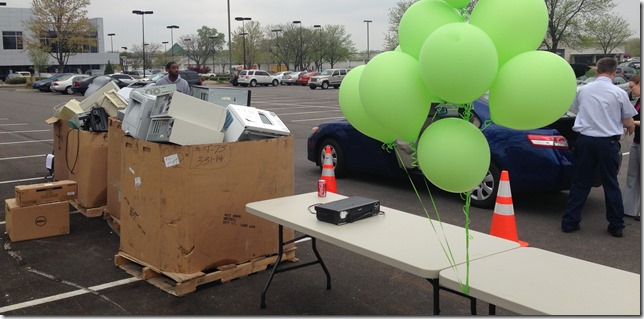
Somebody at either TR or BH decided it would be a good idea to invite Bluegrass E-Cycle over.   I am very glad they did that; we had several servers and monitors and microwaves (yes, microwaves) sitting around that needed to be dealt with.

photo

The news flash is that they are doing the same thing tomorrow, at one of TR’s other properties.  Click on map for link to google maps to get directions.   I don’t know if the address (200 Bullitt Lane) is correct or not.  I’m guessing the timing is similar:  9am to 3pm. 

image

* Bluegrass E-Cycle image cross-linked from their website – hope you guys don’t mind, I’m trying to promote you.

Timelapse of Ames 3d print

Thanks to DropCam and a $10/month subscription, I have a 7 day window that I can create Time Lapses from.

The Dropcam has a hard time focusing this close, so it’s a bit blurry. You can see the pauses and filament changes in the video.

[youtube=http://www.youtube.com/watch?v=VgyZ8fEe70M&w=448&h=252&hd=1]
Caps are Shunned!

I’ll point the camera out the window and see if I can come up with some other cool timelapses.

Topological Relief map of Ames, multicolor

I did a random search for “Ames” in Thingiverse and I found this gem: http://www.thingiverse.com/thing:171194

image

Seeing as I grew up in Ames, IA .. heck, I have two jobs and one house and my disc golf course on that map.. I was super excited to print it out.

Unfortunately, the model is HUGE and it has some problems.   I did what I could on short order .. 6.5cm (no scaling), at 0.3mm resolution.    I did use the three colors I had, by injecting some code into the generated gcode:

G1 X155 F4000
@pause

And this was the result:

image

Pretty nice as far as “striking”; fail in terms of detail.  I could do better.. XY scale x2, and 0.1mm depth?  Subdivide into N prints to get the XY resolution right?  I might need a bigger computer first, to do the slicing.. it topped out at 2.5GB of memory used, and “the wee laptop couldna’ handle it” (Scotty, Star Trek) (Nuclear Wessels).

Breaking the Recursive NotifyOfPropertyChange()

Another problem I ran into in the WPF world were controls whose side effects led to a endless loop of updates:

image

The outer one is called an “Order”, and the inner one is called a “Trade”

The problem goes like this:

  • Click on the outer one to select everything
    • Inner ones turn on
    • But clicking an inner one, if all of them are turned on
      • selects the Outer one.
        • recursive loop to infinity.

There’s probably some really crazy way to set this stuff up (there seems to be no end of the kind of hoops people will jump through for WPF), but here was my solution:

        private bool _onOrderCheckedFiring; 

        private void OrderChecked(CheckBoxListItemThreeState<OrderListItem> obj)
        {
            if (_onTradeCheckedFiring) return; // we are a result of a trade check, so don't do anything.
            try
            {
                _onOrderCheckedFiring = true;
                foreach (var t in obj.Value.AllTrades)
                {
                    t.IsChecked = true;
                }
                NotifySelectedOrdersChangeProperties();
            }
            finally
            {
                _onOrderCheckedFiring = false;
            }
        }
        protected virtual void OnTradeChecked(CheckBoxListItem<HoldingBase> item)
        {
            if (_onOrderCheckedFiring) return; // result of order check, so don't do any more logic. 
            try
            {
                _onTradeCheckedFiring = true;
                var theOrder = Orders.FirstOrDefault(o => o.Value.Order.OrderID == item.Value.OrderID);
                if (theOrder != null)
                {
                    var areAllTradesChecked = theOrder.Value.AreAllTradesChecked;
                    var newState = theOrder.IsChecked;

                    if (areAllTradesChecked)
                        //all trades are checked; set the order checkbox to true
                        newState = true;
                    else if (theOrder.Value.AreAnyTradesChecked)
                        //not all trades are checked, but some are; set the order checkbox to indeterminate
                        newState = null;
                    else if (!theOrder.Value.AreAnyTradesChecked)
                        //no trades are checked; set the order checkbox to false
                        newState = false;

                    // ReSharper disable RedundantCheckBeforeAssignment
                    //NO, ReShaper, this is NOT a redundant check, because if the value is the same, I don't
                    //  want the notification events firing.
                    if (theOrder.IsChecked != newState)
                        // ReSharper restore RedundantCheckBeforeAssignment

                        theOrder.IsChecked = newState;

                    theOrder.Value.NotifyAreAllTradesCheckedChanged();
                }
                NotifySelectedOrdersChangeProperties();
            } finally {
                _onTradeCheckedFiring = false;
            }
        }


This code is not complete, and it was reformatted to reduce the number of lines to paste.  Basically, I just flag that I’m doing something intricate in one routine, and in the other routine, I see if the intricateness is happening, and if so, I DO NOT fire the thing that would make it recursive.

I’m almost done with this WPF project, I’ll get to go back to the Web World probably next week.  Before I fully forget WPF, I would like to make a chart of all the stuff I’ve learned similar to what I did for MVC.

A Visit to Bricks and MiniFigs

I’ve always loved LEGO’s.    When I found out that Louisville got a Bricks and MiniFigs (franchise) store, I had to go check it out.   (Prices should be visible if you zoom in on the pictures)

Yes, they have Minifigs

image

Yes, they have New-In-The-Box Sets

image

Yes, they have Used Sets – some parts may be the wrong colors, accessories might be missing

image

(The price got cropped.  It was $80)

They have Tubs of Loose Bulk Parts that you can buy:

image

image

I don’t see myself making any purchases there anytime soon.  I have no specific projects in mind; I do have a desire to build some of the sets I’ve seen go by over the years, but it would be more cost effective for me to get an account with Pley than to actually buy the sets, I think.  

Then again, for a large set, at $40/month .. suppose I do this for 3 months.. I don’t get to keep any of the sets.. $120.. Hmm.   Maybe I’ll revisit that.

VisualTreeHelper

I seem to have gotten away from posting any coding things on this blog.   At first I thought its because I really haven’t done anything exciting; most of the work has been “figure out customer’s need, create something that solves that need”.   Then as I dug deeper, I rediscovered some fun things that I had created along the way:

The Problem

There’s a screen with a list of grids (this is a stock trading app) – when tabbing out of one grid, it needed to get to the next grid.  I also needed to jump left and right from master to detail easily.   (Sorry about all the blurring, but those were real numbers):

image

The screen, in and of itself, was a solution to “how to balance a portfolio to get it back in line with sector totals easily”.   The user could enter a proposed change in a holding, see how the math worked, and then click save positions to generate all the trade(s) necessary to make it happen.

Solution

I needed to write code that would take the grid that was currently focused, figure out what the next grid was, and focus there.    when solved, it looks like this:

image

Oy! What is this?  It’s a helper function that I wrote.   Basically, Starting with a known visual element, I look for “stuff that I’m interested in” (if the lambda returns true, then I’m interested in it):

image

This cuts down the (very) complicated visual control tree (see: http://www.codeproject.com/Articles/21495/Understanding-the-Visual-Tree-and-Logical-Tree-in) down into something much more manageable (this is the output of the Dump() function defined below with some additional comments thrown in)

image

Here’s the source that does it:

        public static VisualTreeInterestingNode GetInterestingNodes(this FrameworkElement topDependencyObject, Func<FrameworkElement, bool> isInteresting)
        {
            var timer = new Stopwatch();
            timer.Start(); 

            var topInterestingNode = new VisualTreeInterestingNode() { FrameworkElement = topDependencyObject, Parent = null };

            var nodesToVisit = new LinkedList<Tuple<DependencyObject, VisualTreeInterestingNode>>();
            nodesToVisit.AddLast(new Tuple<DependencyObject, VisualTreeInterestingNode>(topDependencyObject, topInterestingNode));

            while (nodesToVisit.Any())
            {
                var a = nodesToVisit.First();
                nodesToVisit.RemoveFirst();

                var currentDependencyObject = a.Item1;
                var currentInterestingNode = a.Item2;

                int childCount = VisualTreeHelper.GetChildrenCount(currentDependencyObject);
                for (int i = 0; i < childCount; i++)
                {
                    var childDependencyObject = VisualTreeHelper.GetChild(currentDependencyObject, i);
                    if (childDependencyObject == null) continue;

                    var childFrameworkElement = childDependencyObject as FrameworkElement;

                    if (childFrameworkElement != null)
                    {
                        if (isInteresting(childFrameworkElement))
                        {
                            var b = new VisualTreeInterestingNode() { FrameworkElement = childFrameworkElement, Parent = currentInterestingNode };
                            currentInterestingNode.InterestingChildNodes.Add(b);
                            nodesToVisit.AddLast(new Tuple<DependencyObject, VisualTreeInterestingNode>(childDependencyObject, b));
                        }
                        else
                        {
                            nodesToVisit.AddLast(new Tuple<DependencyObject, VisualTreeInterestingNode>(childDependencyObject, currentInterestingNode));
                        }
                    }
                    else
                    {
                        nodesToVisit.AddLast(new Tuple<DependencyObject, VisualTreeInterestingNode>(childDependencyObject, currentInterestingNode));
                    }
                }
            }

            timer.Stop(); 

            return topInterestingNode;
        }

And the VisualTreeNode class that the result is in:

    public class VisualTreeInterestingNode
    {
        private List<VisualTreeInterestingNode> _all;

        public VisualTreeInterestingNode()
        {
            InterestingChildNodes = new List<VisualTreeInterestingNode>();
        }
        public FrameworkElement FrameworkElement { get; set; }
        public List<VisualTreeInterestingNode> InterestingChildNodes { get; set; }
        public VisualTreeInterestingNode Parent { get; set; }

        public List<VisualTreeInterestingNode> Flatten
        {
            get
            {
                if (_all != null) return _all;

                _all = new List<VisualTreeInterestingNode> { this };
                foreach (var child in InterestingChildNodes)
                    _all.AddRange(child.Flatten);

                return _all;
            }
        }

        public StringBuilder Dump(StringBuilder prefix = null, StringBuilder result = null)
        {
            if (prefix == null) prefix = new StringBuilder();
            if (result == null) result = new StringBuilder();

            result.Append(prefix).Append(FrameworkElement.GetType().Name);
            result.Append(" ").Append(FrameworkElement.Name);
            result.AppendLine();

            var l = prefix.Length;
            prefix.Append("  ");
            foreach (var node in InterestingChildNodes)
            {
                node.Dump(prefix, result);
            }
            prefix.Length = l;
            return result;
        }
    }